Biology Practical Copy Class 9: Complete Guide

A biology practical copy is built around looking carefully and drawing what you actually see. Unlike physics or chemistry, where numbers carry much of the mark, biology rewards accurate observation, neat labelled diagrams, and clear comparisons between specimens and slides. This guide explains the full format for a Class 9 biology practical copy: how to set out each experiment, how to write observations of slides and specimens, how to draw and label diagrams properly, and how to finish with a sensible conclusion. Follow it and your copy will show the examiner that you observed, understood, and recorded real biological material, not just copied textbook pictures.
The Biology Copy Format, Step by Step
Each biology experiment opens with the experiment number and title, then a one-sentence aim, then the materials used, such as a prepared slide, a microscope, a specimen, or a chart. The theory is kept short: two or three lines stating the biological idea the experiment shows, for example the structure of a cell or the parts of a flower. The procedure follows as numbered steps describing how you prepared, observed, or examined the material. Then comes the observation section, which in biology usually combines written observations with a labelled diagram, and the copy closes with a conclusion and precautions.
The order matters because it mirrors the scientific method: question, method, observation, conclusion. Keep the same order in every experiment so the examiner can find each part instantly. Leave enough space for the diagram when you plan the page, because a diagram squeezed into a corner after the writing is finished always looks cramped and earns less. A good rule is to plan the page before writing: text on one side or above, diagram space below or opposite, with labels given room. For revision of the theory behind each topic, see the book collection and the solved notes.
Observing Slides Under the Microscope
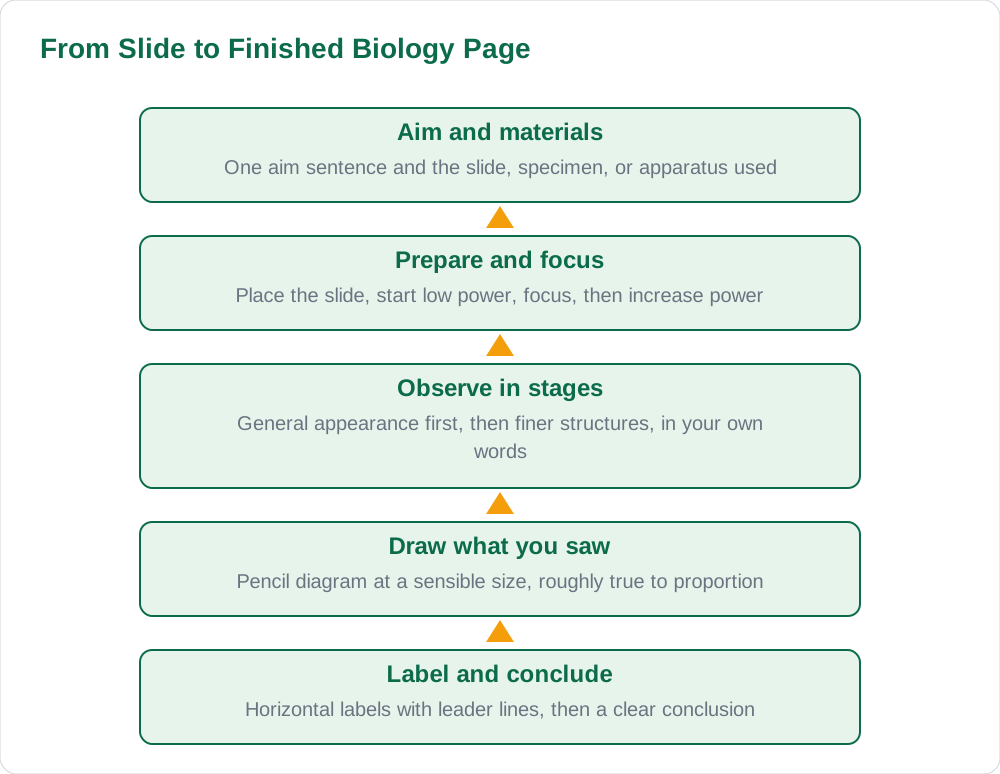
Slide work begins before you look down the microscope: place the slide properly, start with low power to find the specimen, focus carefully, and only then move to higher power for detail. Record what you see in stages, starting with the general appearance and then the finer structures, rather than jumping straight to labels you remember from the book. Write observations in your own words: the shape of cells, the arrangement of tissues, the presence of a nucleus or cell wall, or the distinctive features of the specimen. Honest observation language shows you actually looked, while a list of textbook labels copied without looking shows the opposite.
Always note the magnification you used and the part of the slide you observed, because these details make the record believable and useful. If a structure is unclear, say so and describe what you could see rather than inventing detail. Drawing the slide comes next: draw only what you observed, at a sensible size, keeping proportions roughly correct. A slide drawing that shows three clear, labelled structures you genuinely saw is worth far more than a complex drawing copied from a book that matches nothing on your slide.
Specimens: How to Write Real Observations
Specimen study means examining real material, such as a flower, a leaf, a seed, or a model of an organ, and recording its visible features. Start with the external features: size, shape, colour, and any distinctive parts, then move to internal or structural features you can observe by dissection or sectioning as your teacher directs. Use comparative language where it helps, noting how one specimen differs from another, because comparison is a key biology skill and examiners reward it. Record measurements where they are meaningful, with units, but do not force numbers into an observation that is naturally descriptive.
A strong specimen write-up also explains the function of the parts observed, in a line or two each, so the observation becomes understanding rather than a list. For example, after noting the parts of a flower, a short line on the role of each part turns a description into biology. Avoid copying long textbook descriptions of the specimen; the examiner wants your observations of the material in front of you, supported by a short functional note. If your class studied a specimen from a chart or model, say so honestly rather than pretending you handled live material.
Diagrams That Make the Copy Stand Out
In biology, the diagram often carries the most marks on the page, so it deserves the most care. Draw in pencil, keep the drawing large enough to label clearly, and use simple, clean outlines rather than shading or artistic detail. Label with horizontal leader lines that do not cross each other, writing each label clearly at the end of its line. Give the diagram a title underneath, such as the name of the slide or specimen and the magnification where relevant, so the examiner knows exactly what the drawing shows.
Common diagram faults include tiny drawings, labels written at angles, leader lines crossing through the drawing, and labels copied from the book that point to nothing in your diagram. Check each label by asking whether the line genuinely ends at the structure named. Also keep the diagram on the same spread as its observations where possible, so the examiner can match words to drawing without turning pages. A copy with consistently neat, honest diagrams looks professional from the first page to the last, and that impression carries across the whole copy.
Conclusions and Precautions in Biology
The conclusion of a biology experiment should state what the observation showed, in one or two sentences tied directly to the aim. If the aim was to study the structure of a cell, the conclusion names the structures observed and what they show about cell organisation. Do not write a conclusion that claims more than the observation supports, and do not repeat the whole procedure as a conclusion. A short conclusion that follows from your own observations is exactly what the examiner wants to see.
Precautions in biology are practical and specific: handle slides and specimens carefully, use the microscope correctly without forcing the focus knobs, keep sharp instruments away from fingers, and clean and return apparatus after use. For experiments involving living material or stains, add the relevant care, such as avoiding contact with stains and washing hands afterwards. As with other subjects, choose the precautions that fit the experiment rather than copying the same list everywhere. End each experiment with a one-minute check: aim, materials, procedure, observations, diagram, conclusion, and precautions all present.
AI Help: Muse AI
Muse AI is Meta's personal AI assistant, and it can help with a biology practical copy by explaining a slide or specimen in simple words, suggesting which labels belong on a diagram, or turning your rough observation notes into clear sentences. For example, you can ask it to explain the parts of a flower or how to describe a cell slide, then write the answer in your own words in your copy. Join Muse with invite code LTGSWD — in the Muse app, go to Settings > Redeem token and enter the code. Disclosure: LTGSWD is the author's Muse invite code. Muse AI does not give official Sindh Textbook Board answers — always verify against your Sindh Textbook Board book and your teacher.
5 key points you must know
- Plan the page before writing so the diagram gets proper space, not a cramped corner.
- Observe in stages: general appearance first, then finer structures, in your own words.
- Draw only what you actually saw, in pencil, large enough to label clearly.
- Label horizontally with leader lines that do not cross, and title every diagram.
- Write conclusions that follow from your observations, never beyond them.
Frequently asked questions
Should biology diagrams be drawn in pen or pencil?
Draw diagrams in pencil, which allows clean lines and easy correction, and write labels in pencil or pen as your teacher prefers. Pencil diagrams with ruled leader lines are the standard for biology practical copies, so keep the drawing neat and unshaded.
What if I cannot see a structure clearly on the slide?
Describe honestly what you could see and note the magnification used, rather than inventing detail. Adjust the focus, try a different part of the slide, or ask your teacher for help. An honest partial observation earns more than a copied complete diagram that matches nothing on your slide.
How detailed should specimen observations be?
Cover external features first, then structural features, with a short functional note for each main part. A paragraph of genuine observation plus a labelled diagram is usually enough. Avoid copying long textbook descriptions, which do not prove you examined the specimen.
Do I need a diagram for every biology experiment?
Almost every biology experiment benefits from a diagram, whether of a slide, a specimen, or a structure studied. If an experiment is purely observational without a drawable object, a labelled sketch of the arrangement or a comparison table can take the diagram's place.
How do I label a diagram correctly?
Use straight horizontal leader lines that end exactly at the structure named, keep lines from crossing, and write labels horizontally and clearly. Put the diagram title underneath, including the specimen name and magnification where relevant.
Solved notes — preview free
These guides work best with the solved exercises. Preview the solved notes free on this website — 119 solved notes for Classes 6–10 in Sindhi, Urdu, English and Arabic medium. Or browse the full solved notes catalogue for your class and medium. New solved notes are added regularly — check the catalogue for coming-soon books.